stairway to vegan

Sharing a journey into the world of fabulous vegan food.


4 Comments

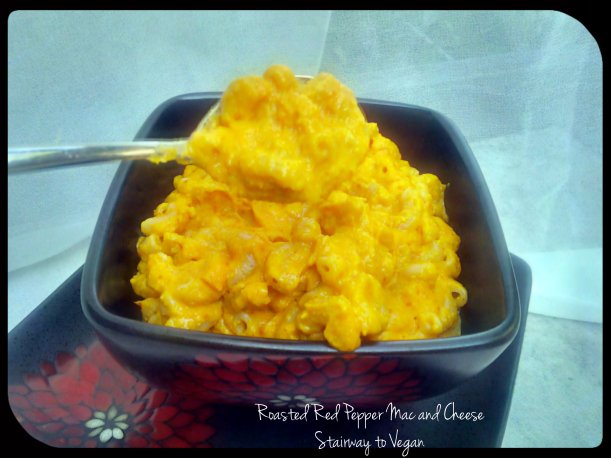
A childhood meal……mmmm Mac and Cheese of course Vegan #MoFo day two

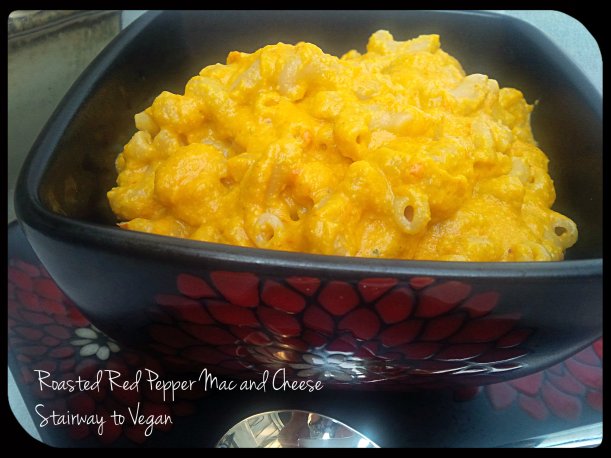
Roasted Red Pepper Mac and Cheese

Roasted Red Pepper Mac and Cheese

So, I am cheating a little with this one. Technically, I did not have Mac and Cheese when I was a child. Growing up in Australia it was not something I was aware of, however, once I moved to Canada, I soon found this warm, gooey, cheesy, pasta and fell in love at first bite. I soon made up for lost time and probably consumed an entire childhoods worth in the first couple of years living  here. So, I guess this is my “second childhood” meal memory.

Roasted Red Pepper Mac and Cheese

Roasted Red Pepper Mac and Cheese

As a vegan, I searched around for a great version of this dish and finally found this recipe by Isa Chandra at the Post Punk Kitchen. If you have not yet visited her site, you should head on over there pronto.  The recipe Roasted Red Pepper Mac and Cheese is so good, when I made it, I ate the entire pot full.

Enjoy,

96B4F31D4DF30EE65A022CF611762965


Roasted Red Pepper Mac & Cheese

By Post Punk Kitchen

Yield: 2 large servings
1/2 pound macaroni or other small pasta
3/4 cups raw cashews, soaked in water for 2 hours
2 teaspoons olive oil
1 small yellow onion, diced medium
2 cloves garlic, minced
2 cups vegetable broth
1 1/2 tablespoons organic cornstarch
1 tablespoon nutritional yeast (optional)
1 roasted red pepper (jarred or homemade)
1 tablespoon tomato paste
1 1/2 teaspoons pizza seasoning
1/2 teaspoon salt
1 teaspoon ground mustard
1/2 teaspoon turmeric

1. Preheat a 2 quart sauce pot over medium heat. Sauté onions in oil with a pinch of salt for 5 to 7 minutes, until onions are translucent. Add garlic and sauté for 30 seconds or so, then transfer to a blender or food processor.

2. Boil a large pot of salted water for cooking the pasta. Once boiling, cook pasta according to package directions.

3. Drain the cashews and add them to the blender along with the vegetable broth, corn starch, nutritional yeast, red peppers, tomato paste, pizza seasoning, salt, mustard and turmeric. Blend until very smooth. Scrape down the sides every 30 seconds or so and test for smoothness.

4. Transfer the sauce in the blender back to the sauce pot where you cooked the onions. Turn the heat up to medium and let cook, stirring very often, until thickened. This should take between 10 and 15 minutes. Taste for salt. It should taste slightly salty because you’re going to be pouring it on the pasta.

5. The pasta should be done while the sauce is thickening, so drain and place pasta back in the pot you cooked it in. Set aside.

6. When sauce is thickened, add it to the pasta in the pot, and use a large slotted spoon to mix well, taking care not to break the pasta.



Leave a comment

Salad Jars #vegan #saladinajar

Salad Jar's

Salad Jar’s

I love salad in the summertime. I take one to work with me every day for lunch. Sometimes I make it in the morning and other times I just take all the ingredients with me to work and construct the salad in the kitchen there.

Recently I was at a Chapters bookstore and I saw the front cover of a book dedicated to making all kinds of different salad’s in large mason jars. What a great idea.

Here I put my dressing in the bottom and then added chickpeas, and then layered the other salad ingredients until finally I added the lettuce, spinach, arugula mix at the very top. This way the lettuce does not get the dressing on it until you are ready to eat and does not get all soft and wilted.

I also cheated, slightly, by using whole cherry tomato’s. Not only do they look incredibly pretty in the jar, but because they are whole and not cut, the tomato’s also dont get soft.

You can use your imagination for the ingredients, I am thinking of adding mushrooms, snow peas, corn, dried fruits, nuts…….there really is no limit to what you could add (other than avocado or perhaps banana or any other item that will brown upon cutting). Just keep in mind that the idea is to keep the dry ingredients at the top and the wet at the bottom.

Salad Jar's

Salad Jar’s

I made three jars to see how well they keep and am happy to advise that on day two, everything is just as fresh and delicious as day one. How nice to open my fridge in the morning and just grab a jar and head to work. And they look really pretty sitting on the shelf.

Enjoy,

96B4F31D4DF30EE65A022CF611762965

Salad Jar's

Salad Jar’s

Salad Jar’s with Dijon and Olive Oil Dressing

Makes 3 jars

Dressing

  • 2 Tblspn’s olive oil
  • 1 Tblspn balsamic vinegar
  • 1 Tblspn dijon mustard
  • 4 Tblspns water

Salad Ingredients

  • 1 can chickpeas rinsed
  • 1 1/2 red peppers diced
  • 1 English cucumber diced
  • 1/2 Head Fennel chopped finely
  • 1 pint cherry tomato’s
  • 6 cups salad greens
  • 3 large mason jars


To make dressing, combine all ingredients in a bowl and whisk until completely combined and emulsified.

Divide the dressing between the three large mason jars.

Divide the salad ingredients between the three jars layering:

chickpeas then red peppers, then cucumbers, then fennel, then cherry tomato’s then salad greens.

Store upright in fridge until ready for use.

When ready to serve, shake briefly then empty out onto plate. You may need to help the salad greens out.

Salad Jar's

Salad Jar’s

Nutrition Facts
Serving Size 579 g
Amount Per Serving
Calories 562
Calories from Fat

144
% Daily Value*
Total Fat 16.0g 25%
Saturated Fat 2.0g 10%
Trans Fat 0.0g
Cholesterol 0mg 0%
Sodium 190mg 8%
Potassium 1364mg 39%
Total Carbohydrates 85.0g 28%
Dietary Fiber 26.1g 104%
Sugars 14.7g
Protein 27.4g
Vitamin A 96% Vitamin C 103%
Calcium 23% Iron 51%
Nutrition Grade A
* Based on a 2000 calorie diet

Nutritional Analysis

Good points
Salad Jar's

Salad Jar’s


Christmas Feast


6 Comments

Merry Vegan Christmas Feast

Christmas Feast

Christmas Feast

Christmas is here already. Time has just flown by. With all the presents wrapped and under the tree, the only thing left is the Christmas Feast tomorrow. I will try to take some photo’s but I have a feeling, that may not happen. I did a practice run for the centrepiece, the Krispy Skin Festive Roast and it turned out wonderful. This is a seitan roast, so unfortunately will not be suitable for gluten intolerant people. I have experimented with eliminating gluten from my diet, and I do not notice any difference, so for special occasions, I will include it. I still have a suspicion it is healthier to limit the amount of gluten in your overall diet.

The recipe for the roast is below, along with the links to all the other goodies that I have already posted previously, just click on the menu items to be taken to the recipes.

One note regarding the roast. When I made it the first time, I did not stuff it. I have just finished cooking the roast for tomorrow in the simmering broth and it is cooling in the broth as we speak. Tomorrow I will add the Krispy Skin and bake it before serving. I did stuff this one, so am very interested in how it will turn out. I will keep you posted.

Speaking of the Krispy Skin, this is fantastic, it is deliciously tasty and crisp but with no guilt. I have taken the concept of this from Chef Skye Michael Conroy (who I recently discovered). His site is amazing and full of wonderful vegan goodies, especially cheeze. I have asked Santa for one of his cookbooks for Christmas.

I wish you all a fantastic Christmas and hope you get to enjoy spending time with your friends and family.

Enjoy,

96B4F31D4DF30EE65A022CF611762965

Krispy Skin Festive Roast

Krispy Skin Festive Roast

Christmas Feast Menu:

Festive Bites

Pumpkin coriander Soup with Coconut Cream

Gluten Free Bread

Krispy Skin Festive Roast

scalloped Twin Potato’s

Sweet Oven Roasted Vegetables

Asparagus with Cauli Cheez Sauce

Sugarplums

Krispy Skin Festive Roast

Serves 6 – 8

  • 1/4 cup tamari or soy sauce
  • 2 Tblspns sea salt
  • 4 garlic cloves crushed
  • 1 onion diced
  • 4 cups vegetable stock
  • 3 cups vital wheat gluten
  • 1 cup chickpea flour
  • 1/4 cup whole wheat flour
  • 3/4 cup finely ground raw cashews
  • 4 Tblspns onion powder
  • 4 tspns garlic powder
  • 2 Tblspns dried sage
  • 1 Tblspn poultry seasoning
  • 1 packet dry vegan gravy mix
  • 3 1/2 – 4 cups vegetable stock
  • rice paper
  • 3 Tblspns vegan butter
  • 1 Tblspn tamari or  soy sauce
  • Large Piece cheesecloth and twine

In large stock pot, combine 1/4 cup tamari, sea salt, garlic, onion and vegetable stock. Add 4 cups water. Heat stock to boiling then reduce to simmer until ready to add roast.

In large bowl combine vital wheat gluten, chickpea flour, whole wheat flour, ground raw cashews, onion powder, garlic powder, sage, poultry seasoning and vegan gravy mix.

Make well in centre of dry ingredients, quickly add vegetable stock and mix together. The dough should be moist and not dry. Add additional water if necessary. Knead the dough for 10 mins. This is necessary to create the desired texture.

Place two thicknesses of moistened cheesecloth on counter, place dough on middle of cheesecloth and shape into a loaf. Securely wrap loaf completely in cheesecloth. Tie securely with twine, wrapping it around every two inches.

Add wrapped loaf to the simmering stock. Add additional hot water if necessary to ensure the loaf is completely submerged. The loaf will sink to the bottom of the pot. Let loaf simmer gently (do  not boil) until it floats, approx 1 1/2 – 2 hours. Turn off heat and allow loaf to cool in the broth. You can prepare the roast up to this point the day before. Store overnight in the refrigerator either in the broth or, in a plastic bag.

Remove cheesecloth. Preheat oven to 375 F

Combine the  vegan butter (melted) with remaining tamari and set aside.

Soak enough rice sheets to completely cover roast twice, in warm water.

Brush roast with melted butter/tamari mixture, cover with soft rice paper and smooth. Repeat with  butter and rice paper, finishing with butter, reserving some to use during cooking.

Place roast on oven tray and bake uncovered for 45 mins basting every 15 mins until crispy.

Krispy Skin Festive Roast

Krispy Skin Festive Roast

Nutrition Facts Krispy Skin Festive Roast
Serving Size 239 g
Amount Per Serving
Calories 331 Calories from Fat 120
% Daily Value*
Total Fat 13.3g 20%
Saturated Fat 3.9g 19%
Trans Fat 0.0g
Cholesterol 0mg 0%
Sodium 1133mg 47%
Total Carbohydrates 37.8g 13%
Dietary Fiber 6.0g 24%
Sugars 6.7g
Protein 18.7g
Vitamin A   1% Vitamin C 6%
Calcium 7% Iron 18%
Nutrition Grade B+
* Based on a 2000 calorie diet

Nutritional Analysis

Good points
Bad points


Leave a comment

Spicy Thai Noodle Bowl #vegan #gluten free

Spicy Thai Noodle Bowl

Spicy Thai Noodle Bowl

What do you get when you add brown rice penne noodles to a spicy Thai vegetable soup? A delicious Spicy Thai Noodle Bowl. Perfect for a cool Fall Sunday lunch. The addition of the brown rice noodles makes this a perfect comfort food while keeping it gluten-free.

The mixture of white and sweet potato’s satisfy my love of anything potato while upping the nutrition and fibre content. You may think having both potato’s and noodles in the same dish is a little overload, but for me it is just right. You could always substitute the white potato’s for any other vegetable of choice, but for me, the only thing better than potato’s or pasta, is potato’s and pasta.

Spicy Thai Noodle Bowl

Spicy Thai Noodle Bowl

The spice level in this soup is quite high, but if you leave it overnight before serving, a lot of the heat is reduced. I love a nice spicy dish during the colder months, somehow it warms you up from the inside. Feel free to change the level of spice to your personal taste. Reduce the amount of Thai Chilli Sauce, or the jalepeno, or remove the seeds from the jalepeno, all will lower the heat.

Enjoy,

96B4F31D4DF30EE65A022CF611762965

Spicy Thai Noodle Bowl

Spicy Thai Noodle Bowl

Spicy Thai Noodle Bowl

  • Serves 8
  • 4 cloves garlic peeled
  • 1 jalapeno pepper
  • 2 Tblspns fresh ginger
  • 3 large onions cut in half
  • 2 medium carrots
  • 6 cups vegetable stock
  • 2 Tblspns ground coriander
  • 4 Tblspns Sweet Thai Chilli Sauce
  • 2 medium sweet potato’s chopped
  • 2 medium white potato’s chopped
  • juice from 2 limes
  • 4 cups cooked brown rice penne
  • fresh basil to garnish if desired.

Place garlic, jalapeno, ginger and onions in a food processor. Pulse a few times until very finely diced (alternately, you can finely dice or grate by hand).

Add garlic mixture to  a large pot with 1 cup of the vegetable stock and place over medium heat.

Run carrots through food processor with the slicing blade (or cut thinly by hand). Add to pot with garlic mixture.

Add coriander and Sweet Thai Chilli Sauce to pot with remaining vegetable stock. Heat to a simmer.

Add chopped sweet and white potato’s. Continue to simmer for 10 mins or until potato’s and carrots are tender. Turn off heat,

Stir in juice from 2 limes,

Spoon 1/2 cup cooked penne into a bowl, ladle soup over top and if desired garnish with whole, or chopped fresh basil.

Spicy Thai Noodle Bowl

Spicy Thai Noodle Bowl

Nutrition Facts
Serving Size 302 g
Amount Per Serving
Calories 223 Calories from Fat 12
% Daily Value*
Total Fat 1.3g 2%
Trans Fat 0.0g
Cholesterol 0mg 0%
Sodium 253mg 11%
Total Carbohydrates 49.0g 16%
Dietary Fiber 5.8g 23%
Sugars 11.7g
Protein 4.4g
Vitamin A   161% Vitamin C 34%
Calcium 5% Iron 15%
Nutrition Grade B+
* Based on a 2000 calorie diet

Nutritional Analysis

Good points
Bad points


1 Comment

Cream of Potato and Leek Soup #vegan #soup

Cream of Potato & Leek Soup

Cream of Potato & Leek Soup

This was a perfect weekend for a nice big pot of hot creamy soup. We had our first snow fall yesterday, with quite a bit of the white stuff still hanging around today. Definitely a nice weekend to stay indoors and enjoy some comfort food.

I am not a big fan of traditional creamed soups, but I do love anything potato, so this soup is high on my favourite list.

Fresh leeks, potato’s and the secret (well, not so secret anymore) ingredient, cauliflower, give this soup a rich creamy taste and texture.

The only way to improve this would have been if I had baked a loaf of fresh bread to dip into the creamy goodness. Reality was, that I was feeling very lazy so just the soup this time. Fortunately this recipe is very easy and quick to prepare.

Enjoy,

96B4F31D4DF30EE65A022CF611762965

Cream of Potato & Leek Soup

Cream of Potato & Leek Soup

Potato Leek Soup

Serves 6

2 tblspns olive oil

2 medium onions roughly chopped

6 cloves garlic roughly chopped

2 large leeks, cleaned and chopped

2 cups cauliflower flowerets

2 large potato’s diced

4 cups vegetable stock

½ tspn sea salt

½ tspn cumin

Pinch each black pepper and cayenne pepper  (optional)

1 tblspn lemon juice

Heat oil over  medium heat. Saute onions and garlic for 5 mins till soft. Add white and light green parts of leeks. Continue to cook for additional 5 mins until leeks are soft.

Add cauliflower and potato’s , cook 5 mins more.  Add vegetable stock, salt, cumin and pepper. Cover, reduce heat and simmer for 15 mins or until potato and cauliflower are soft.

Allow to cool slightly. In small batches, transfer to blender and blend until smooth. Return to pot.  Stir in lemon juice and additional salt and pepper to taste.

Garnish with a little fresh parsley if desired.

Cream of Potato & Leek Soup

Cream of Potato & Leek Soup

Nutrition Facts
Serving Size 234 g
Amount Per Serving
Calories 135 Calories from Fat 45
% Daily Value*
Total Fat 5.0g 8%
Saturated Fat 0.7g 4%
Cholesterol 0mg 0%
Sodium 210mg 9%
Total Carbohydrates 20.9g 7%
Dietary Fiber 3.8g 15%
Sugars 4.4g
Protein 3.1g
Vitamin A   10% Vitamin C 60%
Calcium 4% Iron 8%
Nutrition Grade A
* Based on a 2000 calorie diet

Nutritional Analysis

Good points


6 Comments

Scalloped Twin Potato’s plus Greens with CauliCheez Sauce

In last weeks post, I promised the remaining two recipes for my Thanksgiving dinner, and here they are.

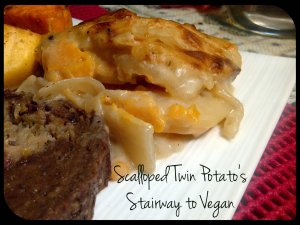
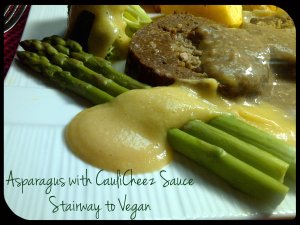
Scalloped Twin Potato’s (at the top middle of the pic) and Greens with CauliCheeze Sauce (at the bottom of the pic). I could not decide if I wanted Brocoli with CauliCheeze sauce, or Asparagus with CauliCheez sauce, so I had both. 🙂

Lentil Seitan Roast with Mushroom Sage Gravy

Lentil Seitan Roast with Mushroom Sage Gravy

This photo is literally what I ate for Thanksgiving (plus a second helping of Scalloped Twin Potato’s, they were so good. While this is a ton of food, I still felt full of energy afterwards, No Turkey overload here, just great food.I decided to make the scalloped potato’s with a mixture of white and sweet potato’s this year. The white potato, while delicious, is a bit of a bad boy, he is the one you love, but you know you shouldn’t. A little is fine, but too much could get you in trouble. Now his twin, Sweet Potato, on the other hand is the good reliable guy, the one that wont hurt you and is actually good for you, He has loads of vitamins and fibre. When you mix the two together, you get the best of both worlds.

Scalloped Twin Potato's

Scalloped Twin Potato’s

When it came time to make the Brocoli and CauliCheez Sauce, I was literally standing in the grocery store with a lovely vibrant green head of brocoli in one hand and a bunch of crisp tender asparagus in the other and I couldn’t make up my mind which one I wanted, so I did both, you can never have too may greens on your plate 🙂

Asparagus with CauliCheez Sauce

Asparagus with CauliCheez Sauce

Both the brocoli and the asparagus tasted wonderful with the caulicheez sauce. The recipe made lots of sauce, so I had some left over. By mid-week, I had a craving for pasta (not an unusual occurrence for me), so I used up the remaining sauce and turned it into Mac and CauliCheeze (no recipe, just added the sauce to cooked pasta and voila!!)

Mac and CauliCheez

Mac and CauliCheez


Enjoy,


Scalloped Twin Potato's

Scalloped Twin Potato’s

Scalloped Twin Potato’sServes 4

  • 2 tblspns olive oil
  • 1 medium onion finely diced
  • 2 cloves garlic minced or grated
  • 1 tblspn flour
  • 2 cups unsweetened almond (or other non dairy) milk
  • 1/2 cup nutritional yeast
  • salt and ground black pepper to taste
  • 2 white potato’s peeled and thinly sliced
  • 1 large sweet potato peeled and thinly sliced

Heat oil in medium pot on medium heat. Add onions and garlic and saute for 5 mins until soft.

Add flour and cook 1 min. Slowly add about 1/2 cup of the almond milk while stirring quickly. The mixture will thicken immediately. Add the rest of the milk and continue stirring until everything is completely mixed. Stir in nutritional yeast and salt and pepper. Lower heat and allow to simmer slowly for a few minutes to thicken. Remove from heat.

Grease the bottom of a baking dish with a little olive oil. Place half the white potato slices in the dish in an even layer, top with half the sweet potato slices, Pour half the milk mixture over the top. Repeat with remaining potato’s and milk mixture.

Bake uncovered in 350 F oven for approx 35 mins or until potato’s a soft and top is lightly browned.

Remove from oven and let sit for 5 – 10 mins before serving.

Asparagus with CauliCheez Sauce

Asparagus with CauliCheez Sauce

Greens with CauliCheez Sauce

Serves 4

1 head of brocoli cut into medium florets’

or, 1 bunch asparagus trimmed (or a combination of both)

Steam brocoli and/or asparagus until just tender.

CauliCheez Sauce

  • 1/2 head cauliflower cut into medium florets’
  • 1 onion finely diced
  • 3 cloves garlic roughly chopped
  • 1/2 tspn smokey paprika
  • 1/4 tspn dry hot mustard powder
  • 1/3 cup nutritional yeast
  • 1 tblspn corn starch
  • 1/2 tblspn lemon juice
  • salt to taste

Place cauliflower, onion and garlic in medium pot, add 2 cups water, bring to a boil, reduce heat, cover and allow to simmer for 20 mins. Remove from heat and allow to cool slightly.

Transfer in small batches to food processor and blend until smooth. Return to pot and add paprika, mustard powder and nutritional yeast. Mix cornstarch with 2 tblspns water to a smooth paste, stir into cauliflower mixture. Return to heat and cook on low for 6 mins until thickened. Stir in lemon juice and salt to taste.

Drizzle sauce over brocoli and/or asparagus and serve.

Nutrition Facts Scalloped Twin Potato’s
Serving Size 281 g
Amount Per Serving
Calories 202
Calories from Fat 54
% Daily Value*
Total Fat 6.0g 9%
Saturated Fat 0.6g 3%
Trans Fat 0.0g
Cholesterol 0mg 0%
Sodium 111mg 5%
Total Carbohydrates 31.8g 11%
Dietary Fiber 6.5g 26%
Sugars 3.6g
Protein 8.1g
Vitamin A   115% Vitamin C 42%
Calcium 18% Iron 19%
Nutrition Grade A
* Based on a 2000 calorie diet

Nutritional Analysis

Good points
Nutrition Facts Greens & CauliCheez Sauce
Serving Size 158 g
Amount Per Serving
Calories 106 Calories from Fat 10
% Daily Value*
Total Fat 1.2g 2%
Trans Fat 0.0g
Cholesterol 0mg 0%
Sodium 202mg 8%
Total Carbohydrates 19.1g 6%
Dietary Fiber 7.3g 29%
Sugars 3.1g
Protein 9.0g
Vitamin A   25% Vitamin C 112%
Calcium 5% Iron 19%
Nutrition Grade A
* Based on a 2000 calorie diet

Nutritional Analysis

Good points


1 Comment

Coconut Vanilla Icecream Sandwiches with Chocolate Fudge Cookies, Vegan MoFo Receipt # 20 !!

Coconut Vanilla Icecream Sandwich with Chocolate Fudge Cookies

Coconut Vanilla Ice cream Sandwich with Chocolate Fudge Cookies

Vegan MoFo Recipe # 20, and for the grand finale, Drum roll please,………. Coconut Vanilla ice-cream Sandwiches with Chocolate Fudge Cookies.

A fitting end to a wonderful month of vegan blogging. This is the first year for both my blog, and, for me to find out and participate in Vegan MoFo. I have had a wonderful (although sometimes exhausting) time. The best part for me is all the other fantastic blogs out there I have found (whoever came up with the randomofo is a genius).

I wanted to end the month with something special. As I have mentioned previously, I do  not have a sweet tooth, so tend to forget the dessert side of cooking, but back at the beginning of summer, I was as the Toronto Vegan Festival and had a coconut ice cream sundae that was sitting on a chocolate brownie. It was so good, I made a note to try to make it at home one day. Well, there is no time like the present.

I have combined a number of recipes to come up with this. The ice cream is the same basic frozen banana soft serve I have been making for a long time, but I added frozen coconut milk for the creamy texture and a little vanilla for taste. The cookie’s are a base of a traditional chocolate chip cookie, but with extra cocoa and no chips. I replaced the egg with the chia and water. The end result is perfect. Rich creamy ice-cream sandwiched in between two fudgey chocolate cookies….yum.

Coconut Vanilla Icecream Sandwich with Chocolate Fudge Cookies

Coconut Vanilla Ice cream Sandwich with Chocolate Fudge Cookies

The cookies for the ice cream sandwiches were made oversize, but you can also make regular size cookies too. In fact, this recipe made three huge ice cream sandwich’s plus another dozen regular cookies.

Enjoy,

96B4F31D4DF30EE65A022CF611762965

Chocolate Fudge Cookie

Chocolate Fudge Cookie


Coconut Vanilla Ice cream Sandwiches with Chocolate Fudge Cookies

Makes 6 sandwiches

  • 1 can coconut milk
  • 1 tblspn cornstarch
  • 1 tspn vanilla
  • 2 bananas
  • 1 tblspn chia seeds
  • 3 tblspns water
  • 2 cups flour
  • 1 cup cocoa powder
  • 1 tspn baking soda
  • 2/3 cup vegetable oil
  • 1 1/4 cups coconut palm sugar
  • 1/2 cup soy (or other non dairy) milk
  • 1 tspn vanilla

Ice cream:

Combine all but 1/4 cup of the coconut milk in pot with 1 tspn of vanilla. Heat gently until quite warm. Combine remaining coconut milk and cornstarch in separate bowl until cornstarch is dissolved. Slowly stir cornstarch mixture into coconut milk, vanilla mixture. Increase heat to medium and cook stirring for 3 – 5 mins until mixture thickens. Remove from heat and allow to cool completely.

Once cool, pour into ice-cube trays and freeze overnight.

Peel and cut banana’s into 1 inch slices. Place in freezer bag and freeze overnight.

When ready to serve, place frozen coconut milk and frozen banana into food processor. Process until smooth and creamy. This will take a few minutes, but the texture will be similar to a soft serve.

Chocolate Fudge Cookies:

Place chia seeds and water in small bowl and let sit for 5 mins to gel.

Combine flour, cocoa, baking soda and salt in bowl. Mix well.

In a separate large bowl, combine vegetable oil, palm sugar and gelled chia seeds. Mix well.  Add soy milk and vanilla and mix to combine.

Add dry mixture into wet mixture and mix until just combined. ( add a little extra soy milk if necessary, mixture should be quite stiff but all dry ingredients should be incorporated)

For large sandwich cookies, take 1/4 cupfuls and roll into balls with your hands then flatten to around 1/2 inch discs.

For small cookies, use tablespoonfuls

Place on parchment lined baking sheets and bake for 10 mins. Keep a close eye on cookies and make sure you do not over cook. The larger cookies might need a min or two more than the small, check middle of cookie with a toothpick to see if cooked.

Remove from trays and place on cooling racks.

When ready to serve, Take one large cookie, top with approx 1/2 cup ice cream and place another cookie on top. Press together gently.

Coconut Vanilla Icecream Sandwich with Chocolate Fudge Cookies

Coconut Vanilla Ice cream Sandwich with Chocolate Fudge Cookies

Nutrition Facts
Serving Size 272 g
Amount Per Serving
Calories 796 Calories from Fat 422
% Daily Value*
Total Fat 46.9g 72%
Saturated Fat 23.0g 115%
Trans Fat 0.0g
Cholesterol 0mg 0%
Sodium 327mg 14%
Total Carbohydrates 96.7g 32%
Dietary Fiber 9.1g   37%
Sugars38.8g
Protein 10.3g
Vitamin A   1% Vitamin C 10%
Calcium 6% Iron 33%
Nutrition Grade D+
* Based on a 2000 calorie diet

Nutritional Analysis

Good points
Bad points


5 Comments

Not an Egg in Sight Salad Wraps, Vegan MoFo Recipe #18

Not an Egg in Sight Salad Wraps

Not an Egg in Sight Salad Wraps

Eating a vegan diet does not mean you have to miss out on all your old favourite things. With very few exceptions, most traditional foods can be veganised and egg salad is no exception.

This version, looks and tastes like the original. This is delicious in a wrap for lunch. I took these to work three days in a row, and enjoyed them every time.

The next step will be to transform this into a tuna salad, maybe with the addition of dulse for the “fishy” taste. I will work on this for a future post. Or, maybe a devilled mushroom. The creative juices are flowing…..:)

Enjoy,

96B4F31D4DF30EE65A022CF611762965

Not an Egg in Sight Salad Wraps

Not an Egg in Sight Salad Wraps

Not an Egg in Sight Salad Wrap

Makes 4 wraps

  • 1 14 oz packages  firm tofu
  • 1/2 cup veganaise (see recipe below)
  • 2 Tblspns finely diced green onions
  • 1/4 cup grated carrot
  • 2 tblspns fresh parsley  finely chopped
  • 2 tblspns fresh cilantro finely chopped
  • 3 tblspns nutritional yeast
  • 1 tblspn dijon mustard
  • 1 tblspn curry powder
  • 4 whole grain wraps

Veganaise:

  • 1/2 cup cashews soaked in water for at least 4 hours
  • 1 -2 tblspns water
  • 1 tspn olive oil
  • 1 1/2 tspn lemon juice
  • 1 small clove garlic
  • pinch sea salt

For Veganaise, blend all ingredients until smooth, adding water as necessary.

For Salad, Mash tofu in bowl with fork, leave some lumps to allow an egg like texture.

Add veganaise to tofu, mix in all other ingredients, except wraps.

Season with salt and pepper.

Place 1/4 mixture onto each wrap, Roll up tightly, tucking in sides as you go. Cut in half to serve.

Not an Egg in Sight Salad Wraps

Not an Egg in Sight Salad Wraps

Nutritional Information does not include wraps.

Nutrition Facts
Serving Size 106 g
Amount Per Serving
Calories 184 Calories from Fat 105
% Daily Value*
Total Fat 11.7g 18%
Saturated Fat 2.1g 10%
Trans Fat 0.0g
Cholesterol 0mg 0%
Sodium 29mg 1%
Total Carbohydrates 13.8g 5%
Dietary Fiber 5.0g 20%
Sugars 2.2g
Protein  9.9g
Vitamin A   54% Vitamin C 19%
Calcium 11% Iron 23%
Nutrition Grade A
* Based on a 2000 calorie diet

Nutritional Analysis

Good points


1 Comment

Apricot Tofu Curry with Brown Rice, Vegan MoFo Recipe # 17

Apricot Curry Tofu with Brown Rice

Apricot Curry Tofu with Brown Rice

What beautiful weather today (and it looks like it is going to continue for the remainder of the week.

I have been in Toronto for a three-day conference for work, so my head is spinning with information. Fortunately I made this Apricot Tofu Curry before I left. I had planned to be clever and post this while I was away, but an unforseen computer glitch ruined that idea. I was still happy to have the meal ready and waiting for me in the fridge when I got home, no need to cook supper tonight, and this dish tastes every better the day (or in this case, three days) later.

This recipe is adapted from a family favourite. I have made Apricot Chicken for years, but now that I am vegan, I needed to make a couple of changes. I

The tofu is marinated overnight and then baked in the apricot sauce. This is a very easy recipe to make, but it looks stunning and tastes even better.

Enjoy,

96B4F31D4DF30EE65A022CF611762965

Apricot Curry Tofu with Brown Rice

Apricot Curry Tofu with Brown Rice

Apricot Tofu Curry with Brown Rice

Serves 4

  • 2  cups cooked brown rice
  • 1 lb firm tofu, drained and cut into pieces (can be cubes or slices, whatever you prefer, I cut mine into triangles)
  • Olive oil

Marinade:

  • ½ tspn chilli powder
  • 1 tblspn garam masala
  • 1 inch fresh ginger, grated
  • 2 cloves garlic minced
  • ½ cup fresh squeezed orange juice
  • ¼ cup fresh squeezed lemon juice

Sauce:

  • 1 cup dried apricots
  • 3 cups apricot nectar ( you can replace with vegetable stock if unable to find)
  • 2 tblspns olive oil
  • 2 onions finely chopped
  • 1/2 packet dry onion soup mix
  • Sea salt and pepper to taste

Combine all marinade ingredients together in a bowl. Add tofu and allow to sit for at least 3 hours in fridge or, ideally overnight.

Preheat oven to 350 F.

Remove tofu from marinade, reserving the marinade,

Coat shallow baking dish with olive oil. Place a layer of onions on bottom, then a layer of tofu, then a layer of apricots,

Mix together the apricot nectar and the onion soup mix, pour over the tofu. Drizzle with reserved marinade.

Bake for 1  hour covered. Remove cover and continue to bake for further 15 – 20 mins. Check often to make sure the top does not burn.

Serve with rice.

Apricot Curry Tofu with Brown Rice

Apricot Curry Tofu with Brown Rice

Nutrition Facts
Serving Size 567 g
Amount Per Serving
Calories 664 Calories from Fat 135
% Daily Value*
Total Fat 15.1g 23%
Saturated Fat 2.7g 13%
Trans Fat 0.0g
Cholesterol 0mg 0%
Sodium 45mg 2%
Total Carbohydrates 116.9g 39%
Dietary Fiber 7.7g 31%
Sugars 10.3g
Protein 19.0g
Vitamin A   66% Vitamin C 222%
Calcium 28% Iron 26%
Nutrition Grade A-
* Based on a 2000 calorie diet

Nutritional Analysis

Good points


Leave a comment

Sushi, Vegan MoFo Recipe #15

Sushi

Sushi

Every now and then I get a craving for Sushi.

I often make sushi with quinoa and brown rice, but this time, I went with the traditional white sticky rice. Sometimes you have to just go with the traditional.

It is really hard to estimate how much of each vegetable you will need, I usually have lots left over, but I just use the leftovers for a stirfry or to toss into a salad.

You can change the vegetables to suit your taste or what you have available, In the past I have used cucumber, snow peas, cabbage, daikon radish and shredded kale. I always add avocado for the creamy texture, but other than that, let your imagination run riot.

When you are preparing your vegetables, you need to slice them into long very thin strips.

I use a sushi mat to help roll the sushi, but you could also use a piece of parchment paper or aluminum foil.

I am heading to a three day conference in Toronto for work, so I am preparing a couple of extra recipes ahead of time. I have tofu marinating away in the fridge for a tasty Apricot Tofu Curry, that will be supper tomorrow night, and a Hearty Split Pea Soup for my Soup Sundays mini theme.

Enjoy,

96B4F31D4DF30EE65A022CF611762965

Sushi

Sushi

Sushi

makes 32 pieces

  • 1 cup uncooked sticky rice
  • 2 tblspns white wine or rice vinegar
  • 8 thin strips zucchini
  • 16 thin strips carrot
  • 1/2 avocado sliced thinly
  • 1/2 red pepper thinly sliced
  • 4 nori sheets
  • soy sauce for dipping

Rinse rice under cold water. Put in pot with  1 2/3 cups cold water. Place over high heat. Bring to a boil, cover, reduce heat to low and cook without touching for 15 mins.

Remove from heat and allow to cool. Add vinegar and mix. Set aside

Place one nori sheet on sushi mat. Cover with 1/4 of the rice, leaving 1/2 inch at top end bare. Make sure the rice is spread evenly over Nori,

Sushi

Sushi

Place 4 stips of carrot along the bottom (approx 1 inch up from edge) horizontally. Top with two strips of zucchine, 1/4 red pepper strips and 1/4 avocado.

Sushi

Sushi

Bring nori sheet up from bottom and roll tightly moving away from you. Wet the top edge with a little water to help stick. Roll completely inside sushi mat (or parchement paper). Press firmly along the roll to compress.

Sushi

Sushi

Repeat with remaining nori sheets, rice and vegetables.

Cut each log into eight equal pieces using a very sharp knife.

Sushi

Sushi

Serve with soy sauce to dip.

Sushi

Sus

Nutrition Facts
Serving Size 46 g
Amount Per Serving
Calories 33 Calories from Fat 8
% Daily Value*
Total Fat 0.9g 1%
Trans Fat 0.0g
Cholesterol 0mg 0%
Sodium 5mg 0%
Total Carbohydrates 5.8g 2%
Dietary Fiber 0.9g 3%
Sugars 0.6g
Protein   0.8g
Vitamin A   13% Vitamin C 6%
Calcium 0% Iron 0%
Nutrition Grade B+
* Based on a 2000 calorie diet

Nutritional Analysis

Good points